| Project | DX Commander portable HF antenna |
|---|---|
| Best for | Portable HF operation, field days and quick multiband amateur radio setups |
| Main idea | A multiband vertical antenna system that packs down for transport and gives useful HF coverage |
| Why it matters | It gives me a practical way to get on HF away from home without dragging a full fixed-station setup around |
| Status | Built, used and part of my portable radio kit |
My portable DX Commander HF antenna setup for amateur radio, covering multiple bands with a practical field-friendly vertical design.
Build
I got the commander in April 2021 after watching many DX Commander Videos. I picked the DX Commander Classic (80m). The kit is a 9m telescopic pole, an element plate, a radial plate, some element spreaders, 2 rolls of DX10 wire and a big bag of hardware. The build instructions are very clear and well written.
When I built the antenna I started by preparing all the metal plates, they come partially finished from the manufacturing process. I smoothed the edges and threaded holes with 120gr paper and then went over everything with scotchbrite. It's left a smooth, semi-matt, very lightly textured surface.


- 80m works as a loaded quarter-wave
- 40m works as a quarter-wave
- 20m works as a quarter-wave
- 17m works as a quarter-wave
- 15m works as a quarter-wave
- 10m works as a three quarter-wave
Elements

I keep meaning to mark the plates to show which element goes through which hole to minimise electrical interactions between the elements, in my experience the antenna works well no matter how you string the elements which is the excuse I use to justify not marking the spreaders!

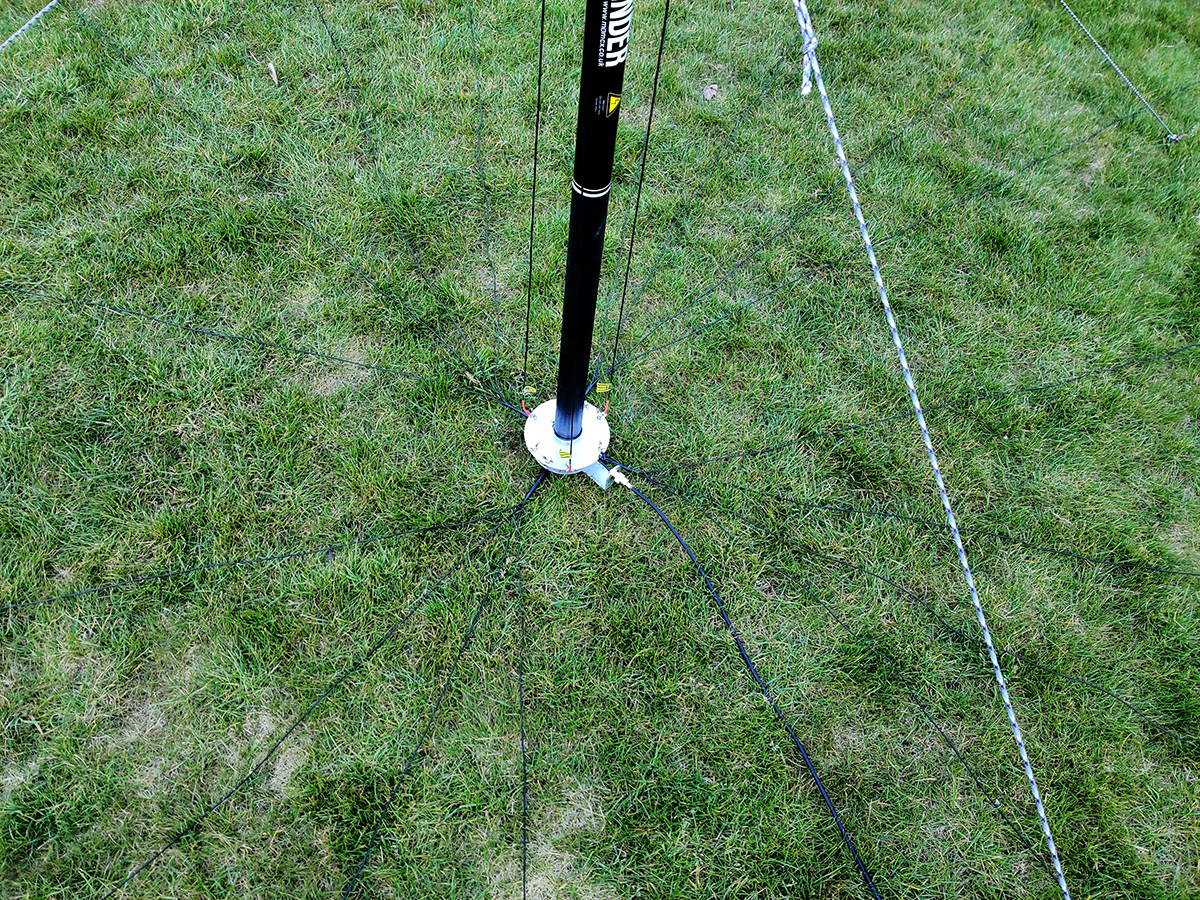
Radials
I've cut my radials to 4m and put 4 radials in a bunch back to a single spade connector. I've got 7 sets of radials, but to be honest, I normally only use 4 of them. More radials does increase efficency, but if you're up on a hill, 4 bunches works fine! The radials have black heatshrink at the spade end. The radials are crimped into a spade and then the join is flooded with solder. I'm not sure it improves anything, but it was the standard I settled on.
Guying
The antenna needs to be guyed. If you're mounting it permanently then you can sink a pole into the ground and slide it over it, but mine isn't, so it needs guying. The guying is a bit of an art, especially if you're going it alone! I use 550 reflective stripe paracord with quick release stainless carabiners that connect to the spreader plates. The other end has sliding aluminum tensioners like you find on tents.

Setup
To set up the antenna I extend the pole & slide the spreader plates over the pole. Then I string the elements I'm going to use from the driven plate, through the spreaders up the pole. I then set the guylines up to roughly the right length & slip the ends over the pegs, with the carabiners roughly where the antenna base will be.Then with the guy ends handy, lift the antenna to vertical. Grab the guy lines and clip them onto the bottom spreader. Hopefully your estimate of guyline length was about right, the antenna should be vertical and relatively stable. Tighten the guylines and make sure they're central. Once you have them tight, you're sorted.
Next job is to connect up the radial bunches. Put yourself in the middle of the bunch, 2 radials in your left hand, 2 in your right hand, seperate the radials between your fingers and slowly walk away from the antenna. When you get to the end of the radial lay them down and spread them out nicely. When you've connected all the radials and spread them out they should provide a circle of radials for the RF pixies to push against.
Final job is to hook up the feedline to the SO239 and your radio and commence operating. After initial setup and tuning I've not touched mine. I used to test it each time before playing, but it never changes. Now I just connect it up and use it. I'm sure this isn't good practice so make sure you test yours before you use yours.
I keep all the elements, radials, spreaders, guylines, pegs and a couple of other bits and bobs (electrical tape, cable ties, pen knife etc.) in a boot bag. It keeps everyting together, when I want to go out I can just grab the pole, the bag and go play. The radials and elements are all wrapped front hand and back hand then secured with velcro straps, so when I get there I can just undo the velcro, toss them and then unravel (failry) nicely.

Thoughts
The antenna is a great performer across the HF bands. 80m is a good compromise, but unless you've got an enormous garden when isn't it a compromise? It's a fun initial build with good clear instructions. Once you've built it, setting it up out and about is simple, takes about 10 minutes. Packing it down, takes a bit longer, probably 15 minutes. By putting the elements and radials away nicely your next setup is easy. If you're having issues, there's a bunch of DX Commander made build & tuning videos on their YouTube channel. The antenna inspires antenna DIYing, which in itself is a great thing.After using the antenna for a few years, when DX Commander announced a new more portable version, The Venture. I had zero hesitation in ordering one. As usual it arrived a couple of days leter, well packaged with the same great assembly instructions. I think my 9m Classic was about £300 when I bought it, checking the website, the new improved MKII (assumed name) version is £340. There's a new variant too, the Signature 9 which is free standing for £400. I bought the Venture on opening day and it was discounted to, I think £160 which in my opinion is a steal.
This isn't a review, but if it was it'd be a 5* review. DX Commander have built a great performing antenna that has plenty of scope for you to personalise it to meet your usage requirements. It's easy to put up and take down. The poles are strong and straight. The wire (DX10) is great, it's soft and flexible and if you're so equiped it can take 1600W for 65 seconds on 20m, they've tested it on FT8 above 21MHz at 500W and no issues.