I work from home, so having a decent desk space is very handy. I also do a bit of tinkering, a decent desk space helps with this too. This is the story of my tinkering & working space. Hasn't got a name yet, but I've only been in here 12 months, there's plenty of time. My space used to be the top floor. When we first moved in Fin was much younger than he is now and didn't want to have it as his room, so I took it and called it the playroom. Fin is a teenager (at time of writing) so the idea of having his own space on the top floor with his own bathroom was very attractive to him. Fast forward, a week or so and I'm kicked out of the playroom and have to turn the old spare room into my new space.
This is not the first time this has happened to me. At the old house, pre kids we had 2 big bedrooms and a box room. We had one bedroom, my tinkering space was the other big room and the box was a dressing room. When Fin came along, I was kicked out of the big bedroom and demoted to the box room.
Anyway, back to the story... Excellent, a clean slate room & I get to make myself a desk. I knew this day would come, so I'd been thinking about what kind of desk I wanted when the day came (again). At the old house I had a big L shaped desk along 2 walls and it was great 1 leg of the L was a PC space and the other was a tinkering space. I measured up and got to sketching.
The room isn't massive it's 3.5 x 3.8m, it's got a single window which looks out onto the back garden and the door is in the corner. Positions of the door & window pretty much forced my hand with placement, but to be fair it's spot on. The room is well lit naturally by the window, and easy to keep ventilated in the summer.
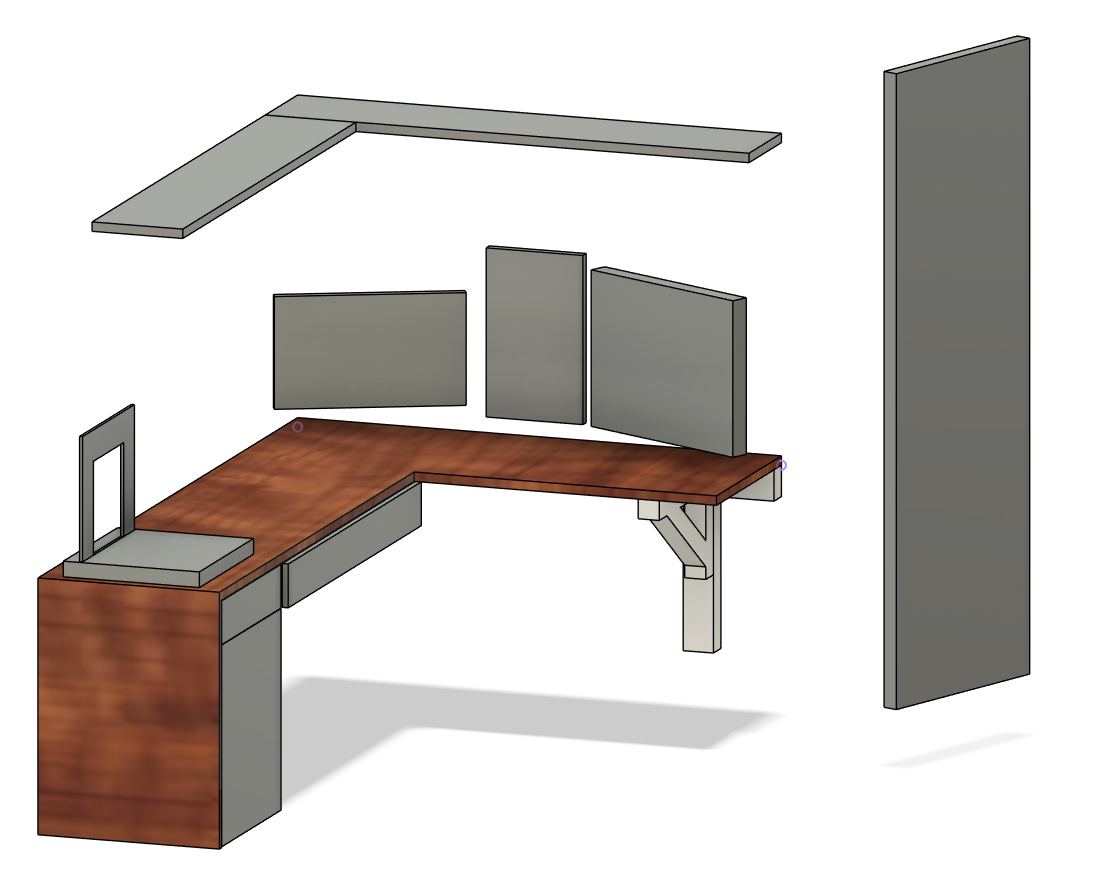
After measuring & initial sketching, I made a 3D model of the room and the desk I wanted to make in Fusion 360. I wanted to make sure it fitted all my stuff - screens, PC, printer, scanner, 3D printer and looked decent in the space.
3D model of the desk in the room.
Just a short drive from home is Berry's builders merchant. It's a DIYers dream. The site is massive, they sell timber, electricals, plumbing, building materials and they've got a kick ass general DIY shop. It's a proper old skool DIY store, the staff are excellent, they really know their stuff. Anyway I got all the wood and the electrical stuff, LEDs, drivers, defusers in one painless visit. Getting the wood home is always a laugh, luckily Mrs T has an SUV which swallows even fairly long bits of wood!
I built some cantilever brackets and attached them and a support beam for the desk surface. The cantilever legs mean that the desk isn't in contact with the floor, short term it means I can get the vacuum cleaner under, long term when I change the carpet I don't need to move the desk. They also help with cable management.
Step 1 - Support.
The top is a pine deck, I plan on swapping it out for a nice surface in the future, I'm not sure what a nice surface is yet. Until I decide the pine is fine. I put a diagonal cut in the edge by the door to make it less intruding and make getting in and out of the room easy. Not that getting out of a room is hard, but witha pointy corner I would've deffo bashed it and given myself a bruise. When it gets replaced, it'll be exactly the same shape as this. I'll move the cable entry, but that's the only change.
Step 2 - Top.
There's a shelf that runs round the room at the perfect height (for me). I put a matching diagonal cut in the shelf for the same reasons as the desk. There's plenty of heavy duty brackets holding it to the wall, so loading the shelves with books & swag is fine.
Under the desk surface I've built some hanging boxes attached to the cantilever brackets. There's an open box next to the door that my PC fits in, it's out of the way, open on one side for ventilation, there's vent holes in the closed side and cutouts for cabling. On the long leg of the L there's a big empty storage tray which I've yet to fully decide what I want to do with, I think I'm going to build 2 more drawers, another thin one and a deep low fronted one.
Step 3 - Hanging Boxes.
The top drawer has filled up and a second will be useful. The bottom contains a couple of old laptops, paper, and other bits, so a deep low fronted 'general purpose' drawer will I think be good, but I'm still thinking about this. The drawer is on soft close runners and down the side of the current big drawer, there's 2 more sets, 1 light weight like the drawer one and a heavy duty one for the deep drawer.
Drawer & Space.
Next to this is another box that has my printer & scanner. The printer just sits there printing, the scanner shelf is mounted on drawer sliders so it pulls out if you want to open the lid fully. I use the sides of the boxes as extra storage, I've printed some brackets for my air blower, screwdrivers, small socket set and a cup holder. Under the top there's a couple iFixit kits, nice and tidy, nice and handy.
Step 4 - Getting There.
There's a strip of high CRI white LEDs under the shelf and desk surface wired into two switches next to the PC box. In use, I generally just have the shelf ones lit, but every now and again I treat myself to a full lightup! There's a network point in the corner by the PC. Behind the centre screen is a simple netgear switch and a WiFi hotspot. Under the desk is a Catalyst 2960 switch that I use for the PC, hotspot & netgear switch.
As I've used the space I've tweaked bits of it. I spend quite a lot of my day on calls, I sit facing the green wall, and there was quite a bit of sound weirdness. I've lined the bottom of the shelf with noise absorbing foam and stuck some to the back of the portrait monitor. It made a huge difference and the sound is now great.
The LEDs are in shallow trunking with a defusing cover, but when I'm sat at the desk the light was quite harsh. To fix this I've cut a 50mm strip of wood and stuck it to the edge of the shelf, it's cut the glare from the LEDs without having any real noticable impact on the general light in the room.
Desk & Shelf Shade.
I've got 2 work laptops and loads of stuff I use then put away in a grey case. I made a little box to keep all this in. Unfortunately there isn't room under the top at this point to mount it, where the two legs of the L meet is one of the cantilevers. I made the box as low as it could be to store the grey case, laptop 2 and the other bits & bobs. It's very tight, but luckliy it doesn't foul my view of the portrait screen. If you were shorter than me it would, but I'm not so it doesn't!
Laptop Park, Like a Car Park, but for Laptops.
The green wall leg is my PC desk it's about 130cm from the face of the laptop box to the edge of the desk and 60cm deep. It's a decent size space loads of room for mousing, typing & sketching. It's well lit and I've put a desk mat of a 911 on it.
PC Desk.
At the side of the PC box is some tool storage, few screwdrivers, side cutters, long nose pliers, strippers, and some tapes. As you can see from the grot on the wall, I wear shoes in the house and I rest my feet on the wall. Naughty I know. Also needs a bit of a dust under there... that's the problem with having under desk lighting!
PC box Tool Storage.
The wallpaper desk is my tinkering desk. It's got the 3D printer at the far end and a set of component drawers next to it. The rest of the desk is space for tinkering. It's about 150cm from the edge of the 3D printer to the front of the PC desk and 60cm deep. It's another decent size. As well as tinkering, at this time of year it's an amazing wrapping space.